Make a Multiband Stereo Imager in Ableton Live
Make a Multiband Stereo Imager in Ableton Live
Multi-band effects units, as the name suggests, are effects that work on multiple bands of audio independently from one another. Some examples of multi-band effects units are multi-band compressors, multi-band harmonic exciters, multi-band stereo imagers, and more.
These types of processors are most commonly used in the mastering phase of music production. However, there is nothing stopping you from using them as creative tools.
To understand how multi-band processing works, we must also understand how the signal flows from source to output. These signal processors are typically used as “inserts,” so that 100% of the signal is split into “bands” of frequency ranges. Some mastering plugins come with 4-band multi-pressors, as is the case with Logic, Waves, and iZotope plugins, to name a few. Ableton Live actually offers a multi-band dynamic processor that offers 3 bands of compression and expansion. Each band is then processed independently from each other, and finally, all bands are blended together back into the mix.
Understanding how this works is the hardest part. From here, all we need to do is get a little creative in how we’ll split these bands up. For my example, I’ve chosen to use Ableton’s “EQ Three” because its cross-over dial is ideal for choosing which bands we’ll be affecting. Also, the “Mute” function will act as a way to activate only the specific band for that signal path. You can achieve the same effect with an EQ 8, but you’ll need to do a bit more work to ensure your cross-overs are mapped properly. For now, we’ll stick with the simplest solution. What we choose to use after each band has been split up is entirely up to us.
Here are the basic steps for creating the multi-band unit:
- Create an effect rack with a single chain.
- Drop an EQ Three.
- Map the “FreqLow” and “FreqHi” dials to two separate macros of your choice.
- Mute the “Low” and “Mid” band, and rename the chain to “Hi.”
- Right-click on the chain and select “Duplicate,” repeat so you have a total of 3 chains.
- Rename the middle chain to “Mid,” then mute the “Hi” band for that chain and un-mute the “Mid” band.
- Do the same with the last chain but call it “Low.” Also, change the mutes so only the “Low” frequencies are getting through.
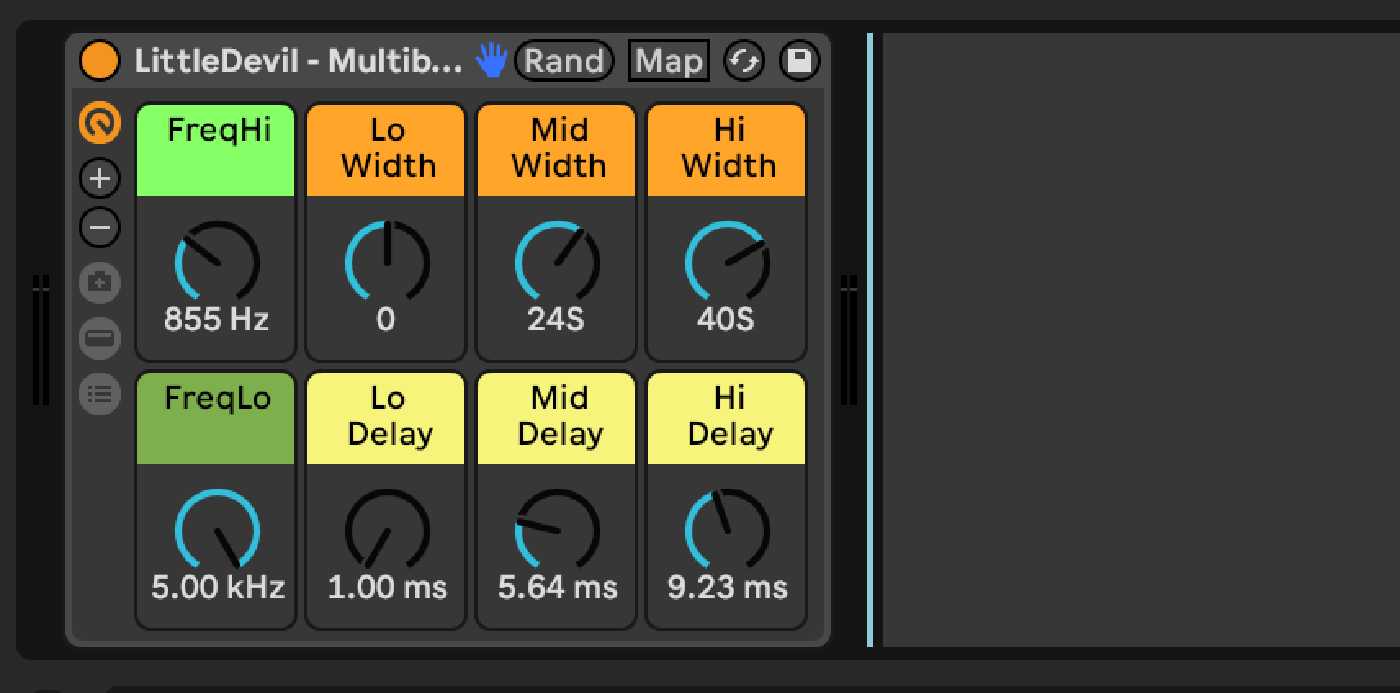
- From here, you can add your favorite effect unit. For my example, I used a utility plugin and a simple delay to create a multi-band stereo imager. Take a look at the video to see how this is done.
Download Ableton Live Rack Here
Enjoy exploring the creative possibilities with this multi-band stereo imager in Ableton Live!
— Juan